How to Pick a Bike-Friendly Campground: A Practical Guide to Mountain Bike–Ready Camping
Choosing a campground that truly supports mountain biking is about more than proximity to a trailhead — it’s about getting more time on the bike, cutting back on hassle, and keeping everyone in your group safe and happy. This guide breaks down what “bike-friendly” really means, why walkable or ride-in trail access matters, which on-site and nearby features matter most for riders, and how to plan and book a trip that balances laps, family time, and safety. You’ll find practical advice on reading trail difficulty, prioritizing rider-focused facilities, and using checklists and mapping tools to build efficient routes. The goal is simple: give you clear criteria — ride-in convenience, repair and wash stations, secure storage, and appropriate campsite types — so you can pick the right basecamp for everything from first-time singletrack to multi-day loops.
Why Choose Campgrounds With Mountain Bike Trails for Your Outdoor Adventure?
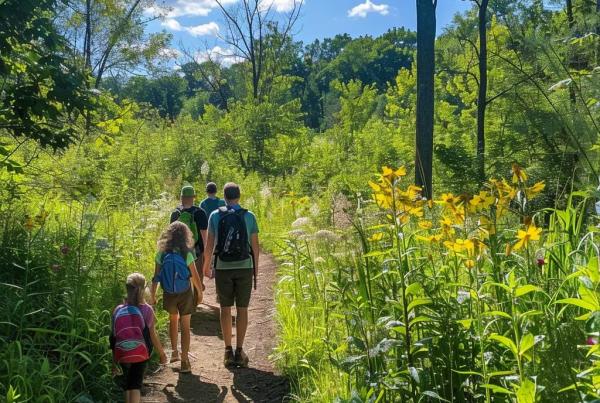
Camping where trails start at—or very near—your site cuts driving and setup time and boosts time spent riding. When you can roll from camp to trail in minutes, you can squeeze in early morning laps, stop back at camp for a relaxed lunch, and head out again for an afternoon loop. That convenience also makes trips safer: quick returns for family needs, gear fixes, or weather changes keep everyone comfortable. For mixed groups, nearby playgrounds, swim areas, and shaded pavilions let non-riders enjoy camp while riders are out on a lap. And when a campground links into a larger regional system, you get variety — shuttle runs, beginner loops, and harder lines — without packing up and moving each night. The next section explains specifically how trail proximity changes daily planning and emergency options with easy examples for morning laps, midday breaks, and evening recovery.
Here’s a short list of the main benefits to remember when choosing a bike-friendly basecamp.
- Immediate trail access saves travel time and increases your daily ride count.
- On-site amenities support bike care and rider recovery between sessions.
- Close proximity makes contingency plans simpler if weather or family needs cut a ride short.
- Access to regional trail networks provides ride variety without changing campsites.
Those advantages explain why many riding groups and families pick trail-adjacent sites for weekend and weeklong trips. The H3 below details practical ways proximity improves the whole trip.
How Does Proximity to Mountain Biking Trails Enhance Your Camping Experience?
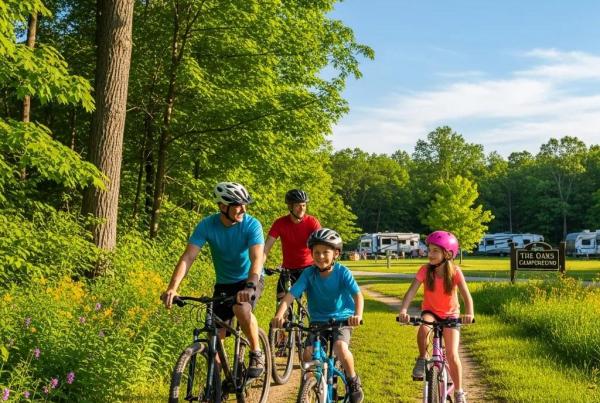
When trails are minutes from your tent or RV, you spend more of your trip actually riding and less of it loading bikes and driving. That’s huge on short trips where every hour counts. Walk-out or ride-in access makes early cool-weather laps easy, lets you return for a relaxed midday break, and still get out for an afternoon loop. It also gives you safer, faster exits for emergencies, bike problems, or sudden family needs. For instance, a quick out-and-back warm-up before a longer loop means less shuttling and more flexible ride planning. Once you value proximity, you’ll naturally focus on campground features — ride-in access, secure bike parking, clear trailhead signs — that keep your day flowing.
What Makes a Campground Mountain Bike Friendly?
A bike-friendly campground pairs solid trail access with services that make riding easier: e-bike charging, repair stands, and wash areas. Helpful policies and on-site resources — clear rules about vehicle parking and bike storage, visible trail maps and signage, and links to local shuttles or rental shops — are part of a reliable checklist. Family-friendly features like playgrounds, a swim lake, and pavilions matter because they let mixed groups enjoy the site while riders head out. Full-hookup RV sites commonly support e-bike charging and longer stays. Even short, informal on-property trails are valuable for warm-ups and skill practice. Use these criteria when comparing sites, and the next section will rank the amenities that most affect daily rider routines.
What Are the Essential Amenities in Mountain Bike Friendly Campgrounds?

Good amenities remove friction between camp and trail so riders can focus on riding, maintenance, and recovery. Rider-specific basics include a dedicated bike wash, a repair stand with tools, and secure overnight storage. Strong supporting amenities are reliable power for e-bike charging, hot showers and laundry to aid recovery after dusty days, and on-site or nearby food options for quick refueling. Before you book, check for rental partnerships, shuttle info, and the distance to local bike shops for spare parts. The table below compares common rider-focused amenities and how often you’ll find them at campgrounds — use it to mark your non-negotiables.
Common biker-specific amenities and their typical availability across campgrounds:
That comparison shows many campgrounds offer some bike-friendly features, but not every site has the same mix. Prioritize what matters most to your group, and the H3 below outlines the rider-specific facilities you should confirm before you arrive.
Which Biker-Specific Facilities Should You Expect?
Facilities that serve riders make multi-day trips smoother: look for a bike wash to remove grit that wears chains and brakes, a repair stand and basic tools for quick roadside fixes, and a secure place to store bikes overnight. Repair gear lets you change tubes or straighten a wheel without jury-rigging, and clear storage policies prevent the unpleasant surprise of exposed bikes. Ask about these items before you go — confirming them ahead of time avoids delays and keeps your planned loops on track.
How Do General Campground Amenities Support Mountain Bikers?
General campground services support recovery, logistics, and power needs. Hot showers and laundry help you clean up and recover after long, dusty days. Full-hookup sites deliver consistent power for e-bike charging so electric-assist riders can count on range and reliability. On-site food, snack options, or nearby towns shorten supply runs and cut down on what you need to carry. Playgrounds, lakes, and pavilions keep non-riding family members occupied, letting riders schedule focused sessions. Match general amenities to how your group uses the site so you balance ride time with comfort.
How to Evaluate Trail Access and Variety Near Campgrounds With Mountain Biking
Evaluating trail access means checking trail type, difficulty ratings, loop options, and the logistics of getting from camp to trailhead. Trail surface and layout shape the ride experience — singletrack offers technical flow and features, doubletrack and gravel favor endurance, and multi-use trails require more caution around other users. Difficulty ratings and good signage help match routes to rider skill, and loop options or shuttleable segments increase the number of different rides you can do from one base. Use mapping platforms and regional trail guides to confirm ride-in possibilities and distances to trailheads; verifying these details beforehand prevents surprises and helps you build reliable daily plans. The table below gives a quick comparison of common nearby trail systems and the attributes that matter most to riders.
Key trail attributes for quick comparison:
Different trail systems deliver different experiences; once you’ve weighed these attributes, the next subsection helps you pick trail types that match rider level and trip goals.
What Types of Mountain Bike Trails Should You Look For?
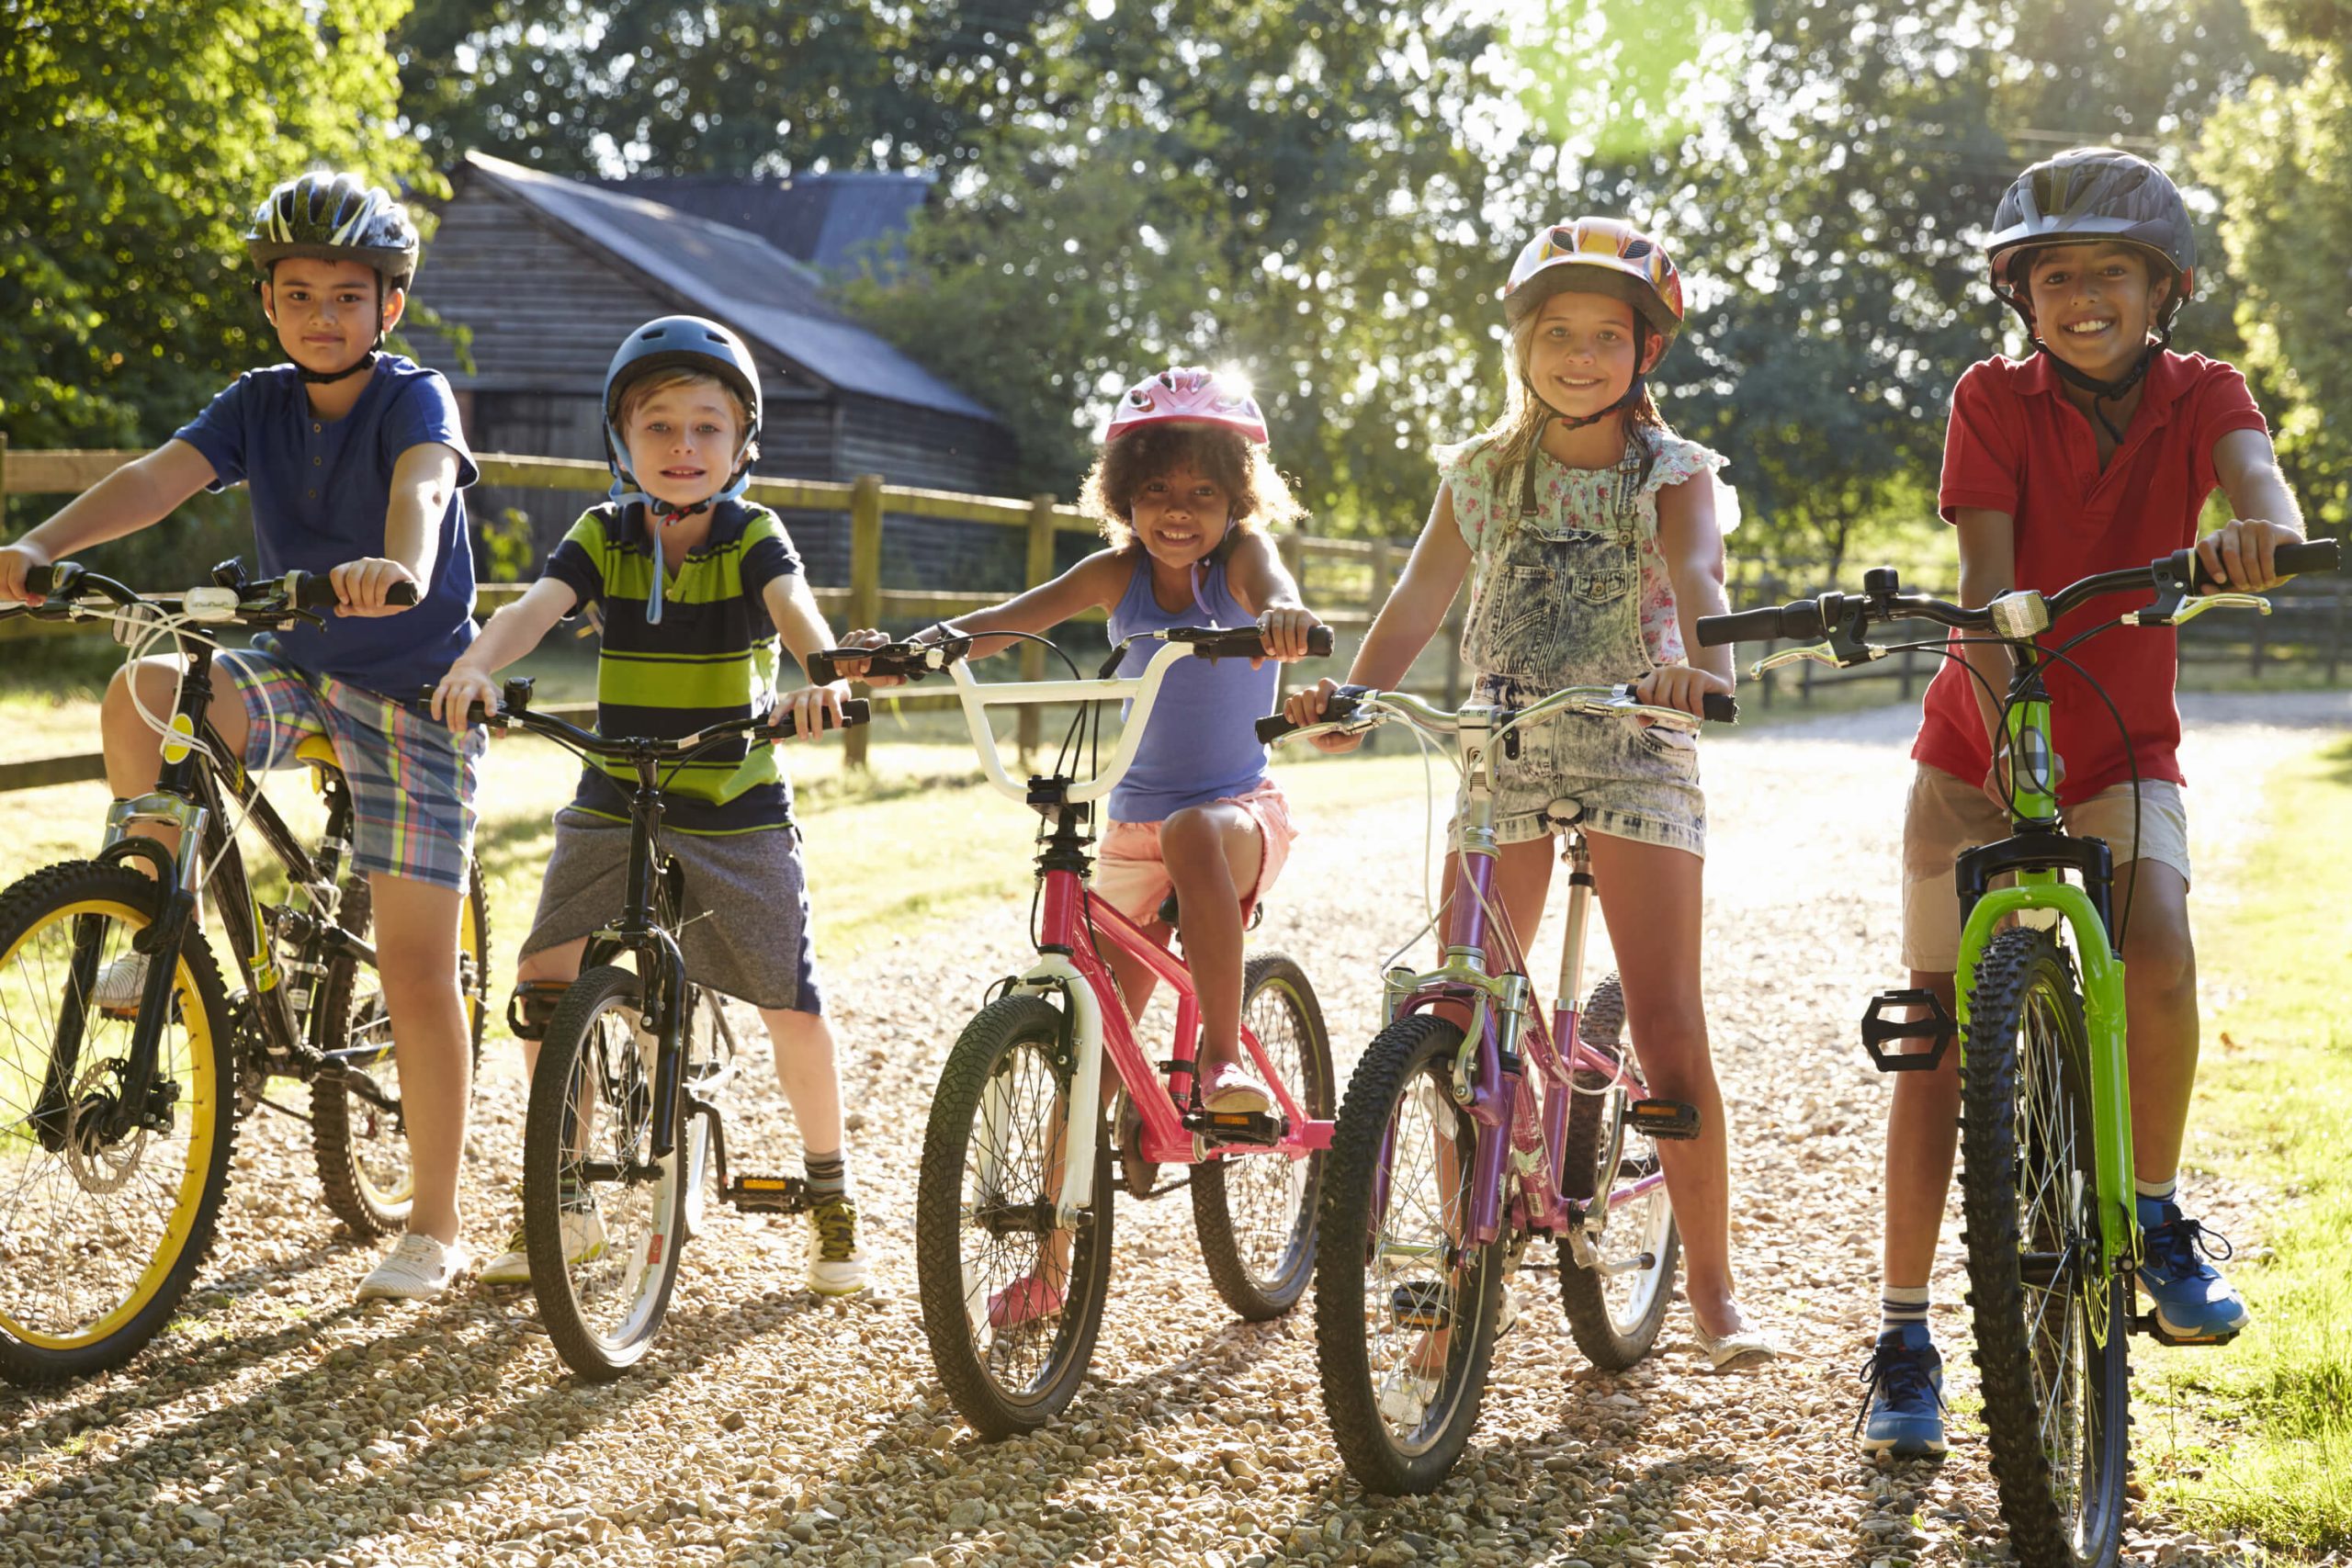
Trail type should match rider skills and the ride you want. Singletrack gives technical features and flow for progression, while doubletrack and gravel routes support steady endurance rides and group pacing. For beginners and families, seek wider, well-marked beginner loops and progressive features that let riders build skills without high consequences. Intermediate and advanced riders should look for sustained singletrack, built lines, and opportunities to link loops for longer rides. E-bike riders should confirm trail and campground policies on e-bikes and prioritize sites with reliable charging or full-hookup options. Picking trail types that match expectations reduces risk and increases enjoyment on arrival.
How Important Is Direct or Ride-In/Ride-Out Trail Access?

Direct ride-in/ride-out access is a big convenience: it saves time, simplifies logistics, and is ideal for short trips, multiple laps, or family schedules that require quick returns. With adjacent trails you can leave gear set up, do focused sessions, and return fast for breaks or emergencies. A short drive to a larger trail network can be worthwhile when it offers higher-quality singletrack or far more miles — the trade-off is more driving and possible shuttle coordination. To verify ride-in claims, check trail maps, campground notes, and local route connectors that link campsites to preferred loops.
What Are the Best Mountain Biking Campgrounds in Michigan and Their Unique Features?
When curating campgrounds, weigh trail quality, on-site amenities, and regional access. In Lower Michigan, options include private family campgrounds with on-property trail features and state recreation sites that open directly onto long public trail networks. Your best pick depends on whether you value convenience, progressive singletrack, family comforts, or RV infrastructure for e-bike charging. The table below helps you compare campground types and their typical trail connections so you can narrow choices based on what matters to your group.
This comparison shows why private family campgrounds and state recreation sites appeal to different priorities. The H3 that follows highlights how The Oaks Campground serves as a regional gateway with practical access notes.
How Does The Oaks Campground Provide Access to Waterloo State Recreation Area Trails?
The Oaks Campground by GatherGrounds is located in Munith, Michigan, and acts as a convenient gateway to the nearby Waterloo State Recreation Area and its connected trail networks, including stretches tied to the DTE Energy Foundation Trail and the Waterloo-Pinckney corridor. The Oaks’ on-site features — full-hookup sites, a swimming lake, a fishing pond, playgrounds, pavilions, and on-property riding trails — serve families and ride groups who want both casual laps and longer excursions into public systems. Because the campground sits within reasonable drive distance of nearby metro areas, it’s a practical base for day loops into Waterloo’s extensive trail acreage while still offering family-friendly amenities back at camp. Reservations and the latest campground details are available on The Oaks Campground page and its public business listing for those ready to book.
What Other Michigan Campgrounds Offer Exceptional Mountain Biking Opportunities?
State recreation areas and regional parks often provide direct access to longer singletrack and multi-day loops, appealing to intermediate and advanced riders after varied terrain and mileage. These public campgrounds usually focus on trail access and loop connectivity rather than creature comforts, so plan for fewer services but more trail miles. Small private RV parks and outfitter-adjacent campgrounds can combine hookups with shuttle coordination and rental partnerships, blending convenience and trail quality. Use trail platforms and local resources to confirm proximity and trail types for any campground you’re considering, and pick the site type that matches whether you prioritize family amenities, technical riding, or long-distance loops.
How to Plan Your Mountain Bike Camping Trip for Maximum Enjoyment and Safety
Great mountain bike camping mixes gear prep, route planning, and safety systems so riders and equipment stay protected. Start by matching intended trail types and daily mileage to your bike setup, spares, and nutrition plan to reduce on-trail failures. Schedule rides around weather, daylight, and family needs so everyone’s expectations are met, and identify emergency exit routes from each loop back to camp. Confirm campsite policies about bike storage and vehicle parking so your arrival is smooth. The sections below offer a focused gear checklist and practical safety tips to use before you leave.
Use this concise packing and prep checklist to organize essentials for both bike and camp.
- Bike maintenance essentials: spare tube, pump/CO2, multi-tool, chain quick link.
- Rider safety: helmet, compact first-aid kit, lights, ID and emergency contact info.
- Camping and recovery: layered clothing, hydration plan, electrolytes, a repair mat or stand.
Treat this as a baseline and adapt for e-bikes, longer trips, or larger groups; the H3 items below expand on essentials and safety practices.
What Essential Gear Do You Need for Mountain Bike Camping?
Separate bike-specific gear from camp essentials so repairs and rides are easy. Pack a reliable pump or CO2, spare tubes or a tubeless repair kit, a multi-tool, a sturdy chain quick link, and a small parts kit with things like brake pads and a spare hanger for longer trips. Safety gear includes a properly fitted helmet, a compact first-aid kit, lights for early starts or late returns, and appropriate layers for changing weather. Camp gear should focus on a comfortable sleep setup, simple food prep and hydration solutions, and a way to clean gritty drivetrains. A repair mat and a dedicated place to dry gear overnight will protect bikes and clothing. Organize by task — rides, repairs, recovery — so equipment is quick to find when you need it.
What Safety Tips Should You Follow on Mountain Biking Trails and Campsites?
Start with cautious ride choices and clear communication: ride within your limits and tell someone at camp your route and expected return. Carry a compact first-aid kit and know basic wound and strain care to stabilize injuries until help arrives; record local emergency numbers and nearby access points before you leave camp. Observe trail etiquette — yield rules, passing protocols, and sensible speeds — to reduce collision risk and preserve trail access for everyone. At camp, secure bikes as allowed, follow food storage rules to avoid wildlife encounters, and respect parking and quiet hours so the site stays welcoming for mixed groups. These simple actions protect riders, preserve gear, and keep trails open for others.
How to Book and Prepare for Your Stay at a Mountain Bike Friendly Campground
Booking well means confirming reservation windows, site types, and bike-related policies so you don’t face surprises on arrival. Reserve early for peak season weekends, and pick a site that fits your needs — full-hookup sites for e-bike charging and RVs, pull-throughs for easy loading, or sites near facilities if you need frequent bathroom or market access. Ask about bike storage rules, whether on-property trails allow mountain bikes, and any e-bike, group-size, or vehicle restrictions before you finalize. The Oaks Campground by GatherGrounds in Munith, Michigan, is an example of a family-focused option with full-hookup sites, on-property trails, and close access to Waterloo State Recreation Area; check the campground’s reservation page or public listing for the current booking and amenity details.
Practical booking tips to secure a ride-friendly campsite:
- Book early for popular weekends and holiday periods to get your preferred site type.
- Confirm policies for bikes, vehicle parking, and overnight storage to avoid surprises at check-in.
- Ask about on-site amenities important to riders, such as electrical hookups and wash areas.
Following these steps minimizes booking friction so you can focus on routes and gear. The H3 sections below answer common reservation questions and show ways to get the most from your stay.
What Should You Know About Reservation Options and Campground Policies?
Most campgrounds use online reservation calendars that show site types and availability; deposits and cancellation windows vary, so note those details when you book. Riders should confirm whether bikes are allowed on site trails, if locked storage is available, and whether electrical hookups support e-bike charging. Group bookings and vehicle rules can affect parking and shuttle staging, so be upfront about group size and vehicle types when reserving. If you’re considering a place like The Oaks Campground, read the campsite notes on the campground page and public listing for the latest amenity and policy updates.
How Can You Maximize Your Mountain Biking Experience at the Campground?
Make the most of your riding time by starting early on favorite loops, staging gear for quick departures, and pre-loading routes on GPS apps with water points and exit routes saved. Park and stage vehicles near the best trail access to cut walking time to trailheads, and plan family activities around predictable ride windows so everyone gets what they want. Use local maps and trail guides to mix skill-building sessions with longer mileage days. Above all, follow campground rules and trail etiquette so bike access stays open and the riding community can continue to enjoy trail-adjacent camping.
- Stage gear the night before so bikes and hydration are ready for early departures.
- Use GPS mapping for contingency routes and to estimate ride time against daylight.
- Coordinate with campground staff or nearby shops for shuttle support or parts when needed.
Booking with these priorities in mind keeps the focus on riding and cuts avoidable interruptions during your trip.
Frequently Asked Questions
What should I consider when choosing a campground for mountain biking?
Look for trail proximity, the types of trails available, and campground amenities that support riders. Direct access to varied routes, rider-focused features like bike wash stations and repair stands, and secure storage are all helpful. Family-friendly facilities — playgrounds, lakes, and pavilions — matter if you’re bringing non-riders. Balancing those factors will give you a better overall camping and riding experience.
How can I ensure my safety while mountain biking and camping?
Wear a properly fitted helmet, carry a compact first-aid kit, and tell someone at camp your route and expected return. Know basic wound care, record local emergency numbers, and learn the nearest access points for help. Practice trail etiquette, secure bikes at night as allowed, and follow food storage rules to avoid wildlife issues. These steps protect you and keep the site welcoming for others.
What are the best practices for planning a mountain biking trip?
Match trail choices to your bike setup and daily mileage goals, and pack a clear list separating bike maintenance items from campsite gear. Plan rides around weather and daylight, identify emergency exit routes back to camp, and communicate expectations with your group. Good prep makes the trip safer and more enjoyable.
How do I find the right trail difficulty for my skill level?
Start by assessing your experience and comfort with technical features. Beginners should choose well-marked, wider trails with gentle grades; intermediate and advanced riders can seek technical singletrack and sustained features. Consult local trail guides and maps for accurate difficulty ratings before you go.
What should I know about campground reservation policies?
Check for required advance bookings, cancellation terms, and any deposits. Ask whether bikes are allowed on-site trails, whether secure storage is available, and if there are electrical hookups for e-bike charging. Also confirm any group-size or vehicle restrictions so there are no surprises at check-in.
How can I maximize my time on the trails during my camping trip?
Ride early to avoid crowds and heat, stage gear the night before, and preload routes on GPS with key waypoints saved. Coordinate family activities around predictable ride blocks and ask campground staff for local trail tips or shuttle contacts. These small steps will get you more quality time on the trail.
Conclusion
Picking a campground with mountain bike access boosts ride time and simplifies logistics for both riders and their families. The right site gives you immediate trail options, supports a range of skill levels, and provides the amenities that keep trips comfortable and safe. Prioritize essentials like bike washes, repair stands, and secure storage so you can focus on the rides themselves. Ready to plan your next trip? Explore our recommended campgrounds tailored to mountain bikers and find the basecamp that fits your group.